Flipkart seller kaise bane (Flipkart for seller)

Start Online Business with Flipkart Marketplace
Start your Online Business at 0% Commission with Flipkart, one of India’s leading e-commerce marketplace, and sell directly to 400 million customers.
Looking to sell your products online? Need assistance to grow your business digitally? Want to take your offline stores - online and start selling hassle-free?
Welcome to Flipkart Seller Hub which enables you to sell your products online and take your business digital with an easy onboarding process. Sell on Flipkart at 0% commission (in certain verticals), explore selling in multiple verticals, gain more profit and expand your reach to a new set of customers - all at a reduced cost of doing business.
Whether you are new to selling online or an existing seller, Flipkart Seller Hub is the ultimate tool that makes selling on Flipkart easier than ever before! This app equips you with various features that help you carry out all the business processes in the easiest possible way on India’s largest marketplace.
- Flipkart App Link- https://play.google.com/store/apps/details?id=com.flipkart.wholesale
- Flipkart Website Link- https://www.flipkart.com/
- Flipkart Seller Website Link - https://seller.flipkart.com
- Flipkar Seller App - https://play.google.com/store/apps/details?id=com.flipkart.seller
- Flipkart Wholesale App Link- https://play.google.com/store/apps/details?id=com.flipkart.wholesale
Video - Flipkart for seller (full review)
Is artical hum apko bta rahe hai kaise hum Flipkart par apna Seller Account bana sakte hai
Flipkart par Seller Account banane ka step-by-step process
- Sabse pehle aap www.seller.flipkart.com ki website ko Chrome Browser mein open kare aur Register Now par click kare

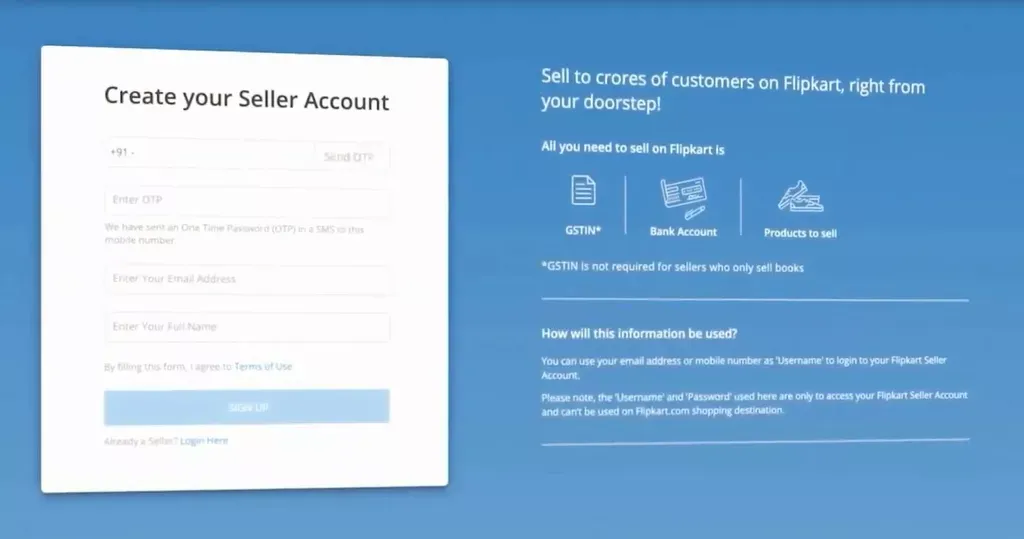
2. Create your seller Account - Yaha par apko apna mobile no. type karna hai fir Send OTP par click kare jo OTP apke No. par aaya ho use Enter OTP mein Fill kare, Ab aap Enter Your Email Address mai apni Email type kare aur neeche bhi apni Email type kare aur Sign Up par click kare
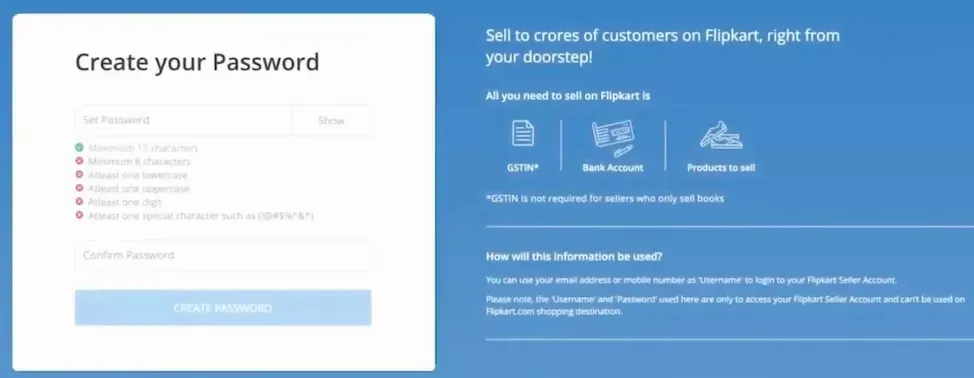
3. Create your password - Isme aap Set password mein koi bhi ak password set kare uske baad Confirm password mein bhi yahi password type karke Create Password par click kare
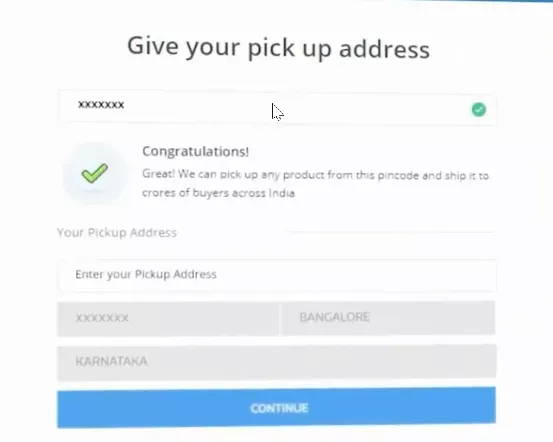
4. Give your pick-up address - yaha par apko apne area ka Pin Code type kare fir Verify par click kare uske baad continue par click kare , ab apko Enter your pick up address mai apna pick up address fill kare aur continue par click kare

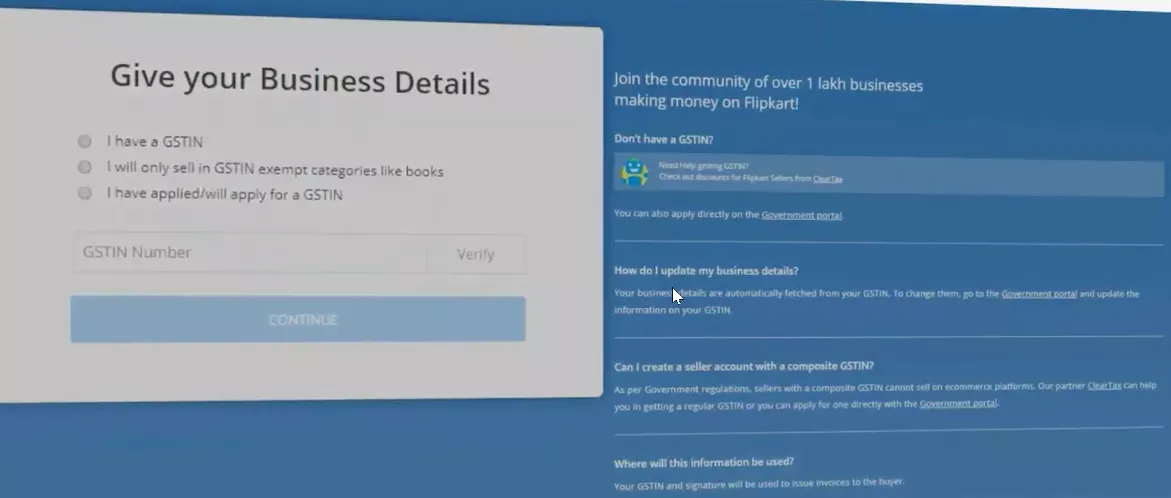
5. Give your Business Details - Yaha par apko apne Business (GSTIN no.) ki Details ke samne tick karna hai jo neeche dikhayi gayi hai , ab kisi ak par tick karne ke baad continue par click kare
- I have a GSTIN - Agar apke pas GSTIN hai to is par tick kare
- I will only sell in GSTIN-exempt categories like books - Aisi category jisme apke product ko sell karne ke liye GSTIN nhi chahiye to is par click kare
- I have applied/will apply for a GSTIN - Agar apne GSTIN applied kiya hua hai to is par click kare
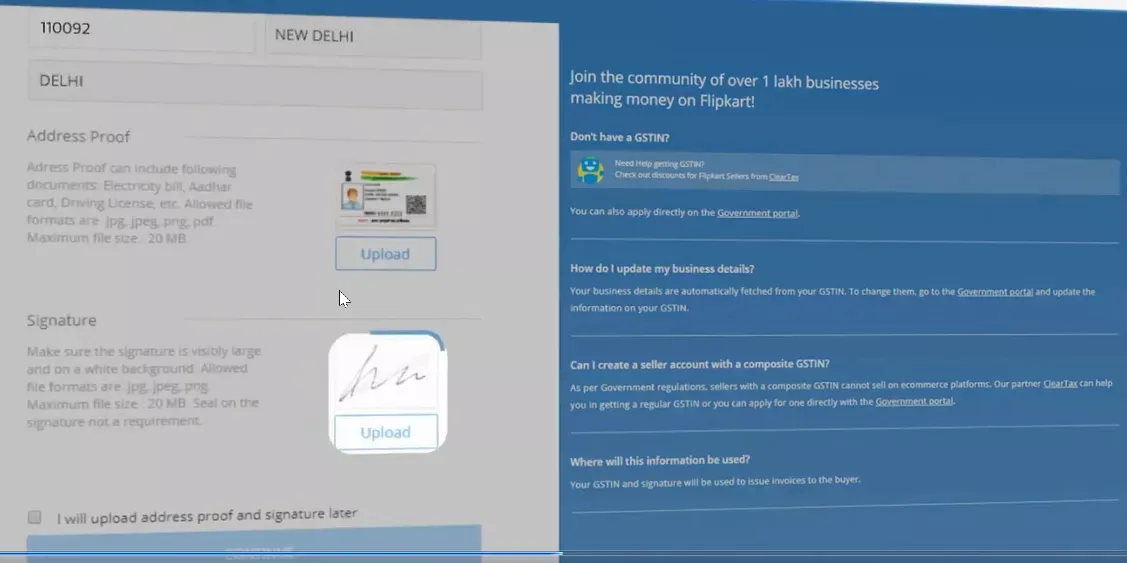
6. Address Proof & Signature - In dono ki details fill karne baad continue par click kare Iski bare mein apko neeche btaya gya hai
- Address Proof - Isme aap kisi ak ki Electricity bill, Aadhar Card, Driving Licence, etc ki picture jpg, jpeg, png, pdf format mein upload kare
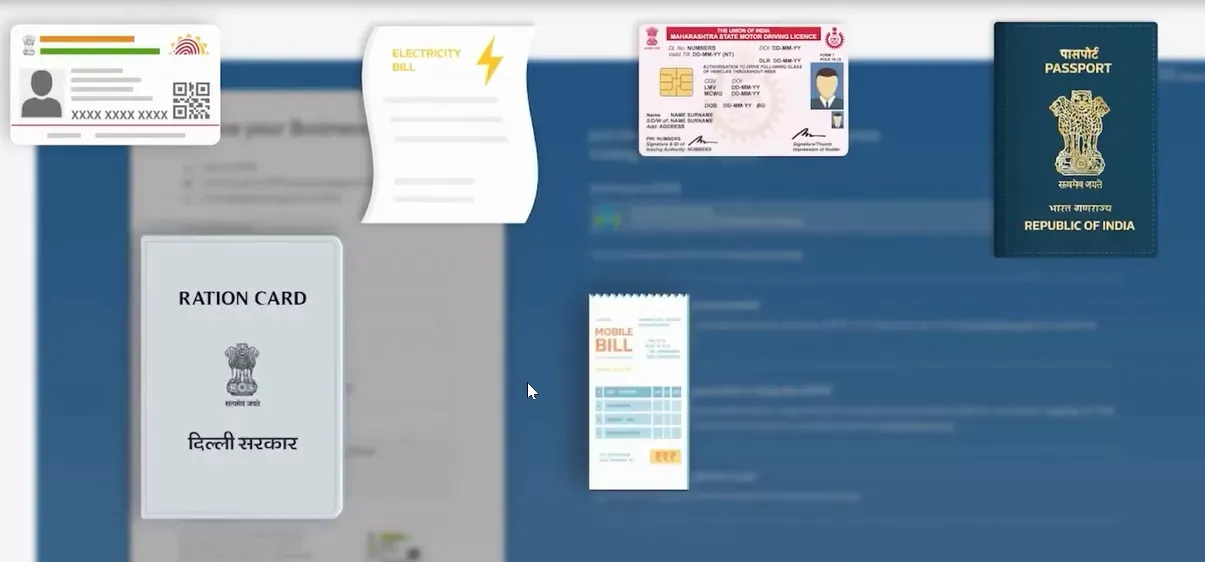
- Signature - mouse ke cursor se drow kare aur upload kare
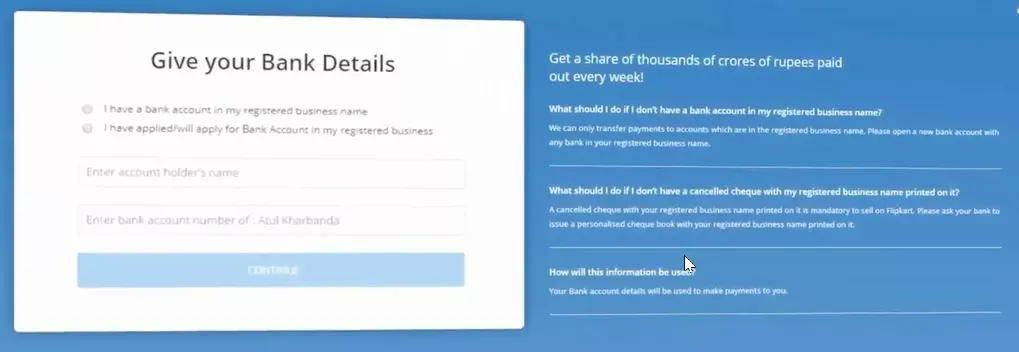
7. Give your Bank Details - Isme aap Enter account holder name mein apna name type kare aur Enter bank aacount number mein apna account no. type kare
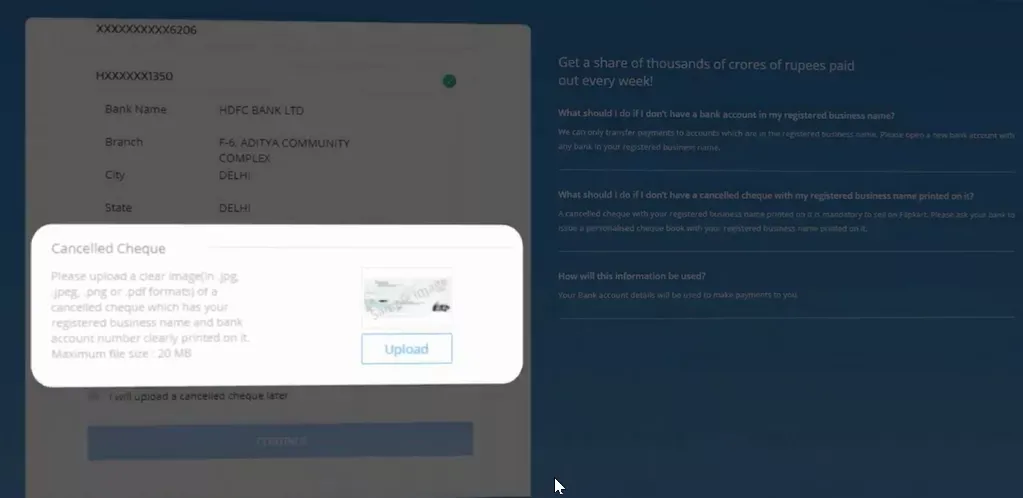
8. Cancelled Cheque - Ak cheque lekar us par 2 line ke khichkar in lines ke beech mein canceled likhna hai fir uski picture ko upload kare
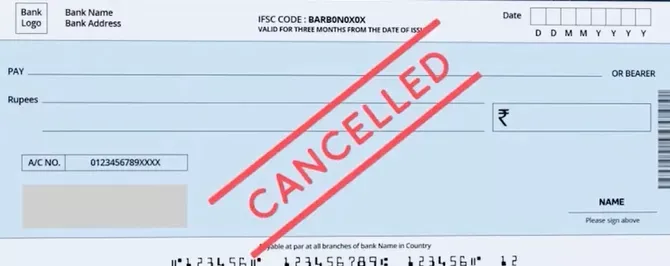
9. Complete Flipkart Seller account - Ab apka Flipkart par seller account ban chuka hai aur aap kisi bhi product ko list karke Flipkart par apne product ko sell kar sakte hai

Note - Is tarha se aap Flipkart par seller account bana sakte ho
Agar aapko ye article pasand aayi ho to aisi hi latest knowledge aur tips ke liye humari website ko subscribe jarur karein.
Apne business ke cashflow aur udhaari ko manage karne ke liye humare app Bahi Khata ko use karein : Download Link - Bahi Khata App
Dhanyavad 🙏



Comments ()